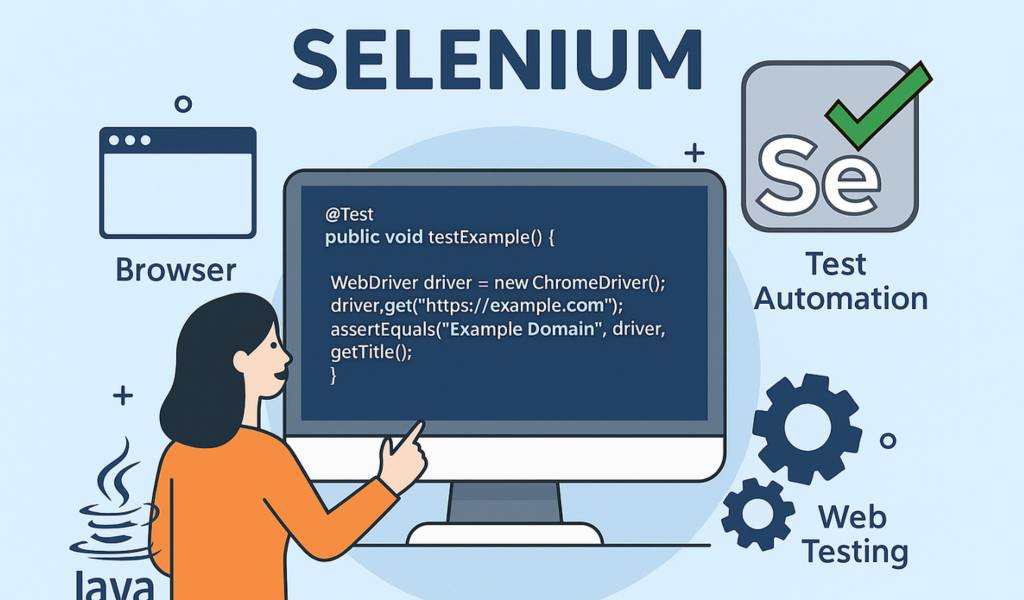
Selenium Cheat Sheet: This blog post is a practical reference guide for anyone working with Selenium WebDriver. Whether you’re just starting out or looking to streamline your automation scripts, having a well-organized set of commands at your fingertips can save you valuable time. This Selenium cheat sheet covers all the essentials—from opening browsers and interacting with elements to handling dropdowns, alerts, popups, waits, screenshots, working with PDFs, Excel files, and more. Use it as a go-to resource to boost your web automation efficiency.
Open Browser
| Sl. No. | Browser Driver Name | Selenium Code |
| 1 | Firefox Driver | WebDriver driver = new FirefoxDriver(); |
| 2 | Chrome Driver | WebDriver driver = new ChromeDriver(); |
| 3 | Edge Driver | WebDriver driver = new EdgeDriver(); |
- WebDriver is an interface provided by Selenium.
- driver is the object name.
- new is a keyword used to create an instance.
- FirefoxDriver()/ChromeDriver()/EdgeDriver() is the constructor that launches Firefox.
💡 Why We Removed System.setProperty(…)
With the release of Selenium 4.6.0, the Selenium project introduced a built-in tool called Selenium Manager. This feature automates driver management completely—no external setup required.
Open URL
driver.get("https://www.amazon.in/");Indentify Elements
| Action | Code | Description |
| Find single Element | driver.findElement(locator) | Returns a web element. |
| Find multiple Elements | driver.findElements(locator) | Returns a list of web elements. |
Locating UI Elements
| Locator Name | Code | Description |
| By ID | driver.findElement(By.id(str)); | Str is id of element |
| By Name | driver.findElement(By.name(str)); | Str is name of element |
| By class name | driver.findElement(By.className(str)); | Str is class value of element |
| By css selector | driver.findElement(By.cssSelector(str)); | Str is cssSelector of element |
| By link text | driver.findElement(By.linkText(str)); | Str is link text of element |
| By partial link | text driver.findElement(By.partialLinkText(str)); | Str is partial text of element |
| By tag name | driver.findElement(By.tagName(str)); | Str is tag name of element |
| By XPath | driver.findElement(By.xpath(xpath)); | Str is xpath of element |
User Actions
| Action | Selenium Code | Description |
| Write text in input fields | driver.findElement(locator).sendKeys(“text”); | Enters the specified text into a text box or input field. – locator identifies the web element. – sendKeys is used to simulate typing text. |
| Click button / radio button / checkbox | driver.findElement(locator).click(); | Performs a mouse click on the web element located by locator Works for buttons, links, radio buttons, and checkboxes. |
| Clear text from input field | driver.findElement(locator).clear(); | Clears existing content from an input field or text area. Useful before entering new data. |
| Navigate back and forward in browser | driver.navigate().back(); driver.navigate().forward(); | Navigates the browser backward or forward in history, similar to browser back/forward buttons. |
| Switch to a frame (iframe) | driver.switchTo().frame(frame); | Switches WebDriver’s context to the specified frame. frame can be: – an index (int), – an id/name (String), – or a WebElement. |
| Switch to another window or popup | driver.switchTo().window(windowHandle); | Switches control to a different browser window or popup using its unique windowHandle. You can get all handles using driver.getWindowHandles() |
| Get inner text of an element | driver.findElement(locator).getText(); | Retrieves the visible (inner) text of the specified web element, such as a label, heading, paragraph, or table cell. |
| Handle auto-suggestions or calendar pop-ups | driver.findElement(locator).click(); | Clicks on the field to activate suggestions or pop-ups (e.g., calendar). Then use Selenium to locate and interact with the suggestion or calendar elements, usually hidden by default. |
Mouse Action – Drag, Drop and Mouse Over etc.
To perform advanced mouse actions like drag and drop, mouse over, right-click, and keyboard simulations, Selenium provides the Actions class. Here’s how to use it effectively.
Step 1: Create an Object of the Actions Class
Before performing any action, you must instantiate the Actions class using your WebDriver instance:
Actions act = new Actions(driver);1️⃣ Drag and Drop using Source and Destination Elements
To drag an element and drop it onto another:
act.dragAndDrop(sourceElement, destinationElement).build().perform();- sourceElement and destinationElement are objects of type WebElement.
- This method simulates the standard drag-and-drop operation from source to target.
2️⃣ Drag and Drop to a Specific Position
To drag an element and drop it at specific x and y pixel positions:
act.dragAndDropBy(sourceElement, xOffset, yOffset).build().perform();- xOffset and yOffset are integer values representing horizontal and vertical movement.
- This is useful when you’re dropping the item at a coordinate rather than another element.
3️⃣ Mouse Over a Specific Element
To simulate hovering the mouse over an element:
act.moveToElement(element).build().perform();- element is a WebElement on which you want to perform the mouse-over.
- This is typically used to reveal dropdowns or tooltips on hover.
4️⃣ Mouse Right-Click (Context Click)
To perform a right-click on an element:
act.contextClick(element).build().perform();Useful for opening context menus or interacting with right-click-only actions.
5️⃣ Mouse Movement After Right Click (Keyboard Navigation)
After right-clicking or focusing, you can simulate keyboard interactions:
act.sendKeys(Keys.ARROW_DOWN).sendKeys(Keys.ENTER).build().perform();- Keys is a Selenium class that provides constants for keyboard keys like ENTER, ARROW_DOWN, TAB, etc.
- You can use this method to navigate menus or options that appear after right-clicking or mouse hovering.
Selenium: File Download
In Firefox
Automating file downloads in Firefox using Selenium involves setting up browser preferences before launching the browser, so that:
- It does not prompt for download confirmation.
- It automatically saves files to a specified location.
Step 1: Set the Firefox Profile
To configure download behavior, you need to create a FirefoxProfile and set specific preferences.
// Create a new Firefox profile
FirefoxProfile prof = new FirefoxProfile();
Step 2: Set Download Directory Location
You need to instruct Firefox where to save downloaded files by setting the preference browser.download.folderList.
// Set download folder preference:
// 0 - Desktop
// 1 - Default "Downloads" folder
// 2 - Custom location (specified in next step)
prof.setPreference("browser.download.folderList", 2);
If you set the value to 2, then define your custom directory path:
// Set the custom directory path where files will be saved
prof.setPreference("browser.download.dir", "D:\\Downloads");
Step 3: Disable Download Popups
By default, Firefox asks for confirmation before downloading. To suppress this, use the MIME type of the file (e.g., PDF, CSV, ZIP).
// Set MIME type of the file to download (no confirmation dialog)
// Example: "application/pdf", "application/zip", "text/csv", etc.
prof.setPreference("browser.helperApps.neverAsk.saveToDisk", "application/pdf");
You can include multiple MIME types using a comma-separated string if needed.
Step 4: Launch Firefox with Configured Profile
Now, launch the Firefox browser using the configured profile:
// Create a new FirefoxDriver instance using the custom profile
WebDriver driver = new FirefoxDriver(prof);
You can now use this driver to navigate to the file download URL, and the file will be downloaded automatically to the specified folder without any prompt.
Example MIME Types
| File Type | MIME Type |
| application/pdf | |
| CSV | text/csv |
| ZIP | application/zip |
| Excel | application/vnd.ms-excel |
| JSON | application/json |
In Chrome
Automating file downloads in Chrome using Selenium is a bit different from Firefox—but yes, it can be done using similar logic by setting ChromeOptions instead of FirefoxProfile.
Key Differences:
- Chrome uses ChromeOptions instead of FirefoxProfile.
- Preferences are set via a Map using options.setExperimentalOption(“prefs”, prefs).
File Download Automation (Selenium Example)
// Set download directory
String downloadFilepath = "D:\\Downloads";

// Create map to store Chrome preferences
Map<String, Object> chromePrefs = new HashMap<>();
chromePrefs.put("profile.default_content_settings.popups", 0);  // Disable popups
chromePrefs.put("download.default_directory", downloadFilepath);  // Set download path

// Set MIME types to auto download without prompt
// Example: PDF, CSV, ZIP etc.
chromePrefs.put("download.prompt_for_download", false);
chromePrefs.put("plugins.always_open_pdf_externally", true); // Avoid opening PDFs in browser

// Apply preferences to ChromeOptions
ChromeOptions options = new ChromeOptions();
options.setExperimentalOption("prefs", chromePrefs);

// Launch Chrome with configured options
WebDriver driver = new ChromeDriver(options);
Common MIME Types for Chrome
Chrome doesn’t need the exact MIME type like Firefox, but if you’re downloading complex files or want to avoid in-browser viewers (e.g., for PDFs), it’s good to:
- Use plugins.always_open_pdf_externally
- Use download.prompt_for_download = false
Handling JavaScript Alerts
Before performing any action on an alert, you must switch to it using the following line:
Alert al = driver.switchTo().alert();This creates an Alert object named al, allowing you to interact with the alert popup.
Available Alert Actions
| Action | Code | Description |
| Click OK on alert | al.accept(); | Accepts the alert. Equivalent to clicking the “OK” button. |
| Click Cancel on alert | al.dismiss(); | Dismisses the alert. Equivalent to clicking the “Cancel” button. |
| Type into prompt alert | al.sendKeys(“hi”); | Sends text to the input field of a prompt() alert. |
| Get text from alert | al.getText(); | Retrieves the message shown inside the alert popup. |
Capture Screenshot of Browser Window
// Step 1: Launch Firefox browser
WebDriver driver = new FirefoxDriver();

// Step 2: Navigate to the desired webpage
driver.get("https://example.com");

// Step 3: (Optional) Handle alert if present
Alert al = driver.switchTo().alert();  // Only if a JavaScript alert is expected
al.accept();  // Accept the alert

// Step 4: Capture screenshot and store it in a file object
File scrFile = ((TakesScreenshot) driver).getScreenshotAs(OutputType.FILE);

// Step 5: Save the screenshot to disk with a specified path
try {
    FileUtils.copyFile(scrFile, new File("C:\\tmp\\k2.png"));
    System.out.println("Screenshot saved successfully at C:\\tmp\\k2.png");
} catch (IOException e) {
    e.printStackTrace();
}
Requirements:
Make sure you have imported:
import org.openqa.selenium.*;
import org.openqa.selenium.firefox.FirefoxDriver;
import org.apache.commons.io.FileUtils;
import java.io.File;
import java.io.IOException;
Ensure the folder C:\tmp\ exists or replace with another valid directory.
Working with <select> Dropdown Lists
Selenium provides a special class called Select (from org.openqa.selenium.support.ui.Select) to handle dropdowns that use the HTML tag.
Step 1: Create a Select Object
First, locate the dropdown element and create a Select object from it:
WebElement dropdown = driver.findElement(By.id("dropdownId"));
Select select = new Select(dropdown);
Ways to Select an Option from a Dropdown in Selenium
| Method | Code | Description |
| Select by Value | select.selectByValue(“optionId”); | Selects the option whose value attribute matches the provided |
| Select by Index | select.selectByIndex(2); | Selects the option based on its position (0-based index). |
| Select by Visible Text | select.selectByVisibleText(“Option Text”); | Selects the option that displays the exact visible text to the user. |
Example
WebElement countryDropdown = driver.findElement(By.name("country"));
Select country = new Select(countryDropdown);

// Select "India" using visible text
country.selectByVisibleText("India");

// Select the second option using index
country.selectByIndex(1);

// Select an option using its value attribute
country.selectByValue("IN");
Wait Statements
Implicit Wait in Selenium
// Set a global implicit wait timeout of 30 seconds
driver.manage().timeouts().implicitlyWait(30, TimeUnit.SECONDS);- This wait applies to all elements globally.
- Selenium will wait up to 30 seconds before throwing NoSuchElementException.
Explicit Wait in Selenium
// Create an explicit wait with a 30-second timeout
WebDriverWait wait = new WebDriverWait(driver, 30);

// Wait until a specific element is visible on the page
WebElement composeButton = wait.until(
    ExpectedConditions.visibilityOfElementLocated(By.xpath("//div[contains(text(),'COMPOSE')]"))
);
Other common ExpectedConditions you can use:
ExpectedConditions.alertIsPresent();
ExpectedConditions.elementToBeClickable(By.id("submitBtn"));
ExpectedConditions.invisibilityOfElementLocated(By.className("loading"));
ExpectedConditions.presenceOfAllElementsLocatedBy(By.tagName("a"));
ExpectedConditions.titleContains("Dashboard");
Fluent Wait in Selenium
// Create a FluentWait with custom polling and exception handling
Wait<WebDriver> wait = new FluentWait<>(driver)
    .withTimeout(Duration.ofSeconds(30))         // Total wait time
    .pollingEvery(Duration.ofSeconds(5))         // Check every 5 seconds
    .ignoring(NoSuchElementException.class);     // Ignore this exception during polling

// Use wait until a specific condition is met
WebElement foo = wait.until(driver -> driver.findElement(By.id("foo")));
Normal Java Wait (Thread Sleep)
// Pause execution for 3 seconds (3000 milliseconds)
try {
    Thread.sleep(3000);
} catch (InterruptedException e) {
    e.printStackTrace();
}
⚠️ Not recommended in automation as it causes unnecessary delays and isn’t dynamic.
Working with Excel Using Apache POI
Why Apache POI?
Selenium does not provide built-in support for reading or writing Excel files. To perform data-driven testing with Excel spreadsheets (.xls, .xlsx), we use Apache POI—a Java API that enables you to create, read, and modify Excel documents.
⚠️ Note: To ensure the following code works, include the necessary Apache POI libraries in your project and import the required classes listed at the end.
// Step 1: Read the Excel file into a FileInputStream
FileInputStream fis = new FileInputStream("D:\\jul_weekend\\hybridframework\\tests\\testscenarios.xlsx");

// Step 2: Convert FileInputStream into a Workbook object
Workbook wb = WorkbookFactory.create(fis);

// Step 3: Get into the desired sheet (by name or index)
Sheet sheet = wb.getSheet("Sheet1"); // or use wb.getSheetAt(0);

// Step 4: Access a specific row
Row row = sheet.getRow(1); // Gets the second row (index starts at 0)

// Step 5: Access a specific column (cell) in that row
Cell cell = row.getCell(2); // Gets the third column

// Step 6: Read the cell value based on its data type. Use anyone or multiple as per your requirement.
String strVal = cell.getStringCellValue();            // For string
boolean boolVal = cell.getBooleanCellValue();         // For boolean
double numVal = cell.getNumericCellValue();           // For numeric
Date dateVal = cell.getDateCellValue();               // For date

// Step 7: Get total number of rows in the sheet
int rowCount = sheet.getLastRowNum();

// Step 8: Get number of columns in the selected row
int colCount = row.getLastCellNum();

// Step 9: Write new data to the same cell
cell.setCellValue("PASS1");

// Step 10: Save the changes back to a new or same Excel file
FileOutputStream fos = new FileOutputStream("C:\\Documents and Settings\\mahesh\\Desktop\\Book1.xlsx");
wb.write(fos);
fos.close(); // Always close the stream
Required Imports
Ensure these imports are added at the top of your Java file:
import java.io.FileInputStream;
import java.io.FileOutputStream;
import java.io.IOException;
import java.util.Date;

import org.apache.poi.ss.usermodel.Workbook;
import org.apache.poi.ss.usermodel.WorkbookFactory;
import org.apache.poi.ss.usermodel.Sheet;
import org.apache.poi.ss.usermodel.Row;
import org.apache.poi.ss.usermodel.Cell;
Handling Windows (Browser) Notifications
Browser notifications (like push messages asking for location, alerts, etc.) can interrupt test flows. Here’s how you can disable them in Selenium using ChromeOptions or handle them with the Robot class.
Method 1: Disable Chrome Notifications Using ChromeOptions
This is the most preferred and clean way to disable browser notifications in Chrome.
// Step 1: Create an instance of ChromeOptions
ChromeOptions options = new ChromeOptions();

// Step 2: Add the argument to disable browser notifications
options.addArguments("--disable-notifications");

// Step 3: (Optional) Set driver path if not using WebDriverManager
// System.setProperty("webdriver.chrome.driver", "path/to/chromedriver");

// Step 4: Launch Chrome browser with configured options
WebDriver driver = new ChromeDriver(options);

// Step 5: Navigate to the target application
driver.get("https://example.com");
Method 2: Handle Notification Using Robot Class (For Native OS Dialogs)
Use this if disabling via browser options isn’t possible (e.g., native Windows popups or system-level dialogs).
// Step 1: Launch the browser and wait for the notification to appear
WebDriver driver = new ChromeDriver();
driver.get("https://example.com");

// Step 2: Use Robot class to simulate keyboard interactions
Robot robot = new Robot();

// Step 3: Add delay to allow the notification to appear
robot.delay(5000); // Wait 5 seconds

// Step 4: Press TAB key to shift focus (if required)
robot.keyPress(KeyEvent.VK_TAB);
robot.keyRelease(KeyEvent.VK_TAB);

// Step 5: Press ENTER to accept/close the popup
robot.keyPress(KeyEvent.VK_ENTER);
robot.keyRelease(KeyEvent.VK_ENTER);
⚠️ Robot class is platform-specific and works only when the browser window is active and in focus.
Handling Calendar (Date Picker)
When interacting with calendar widgets in web applications, Selenium can be used to select a specific date by locating all date elements and clicking the desired one.
Code Example
// Step 1: Click on the calendar input field to open the date picker
driver.findElement(By.id("datepicker")).click();

// Step 2: Locate all the date cells in the calendar table
List<WebElement> allDates = driver.findElements(
    By.xpath("//table[@class='ui-datepicker-calendar']//td")
);

// Step 3: Loop through all dates and click on the desired date (e.g., 28)
for (WebElement dateElement : allDates) {
    String dateText = dateElement.getText();

    if (dateText.equals("28")) {
        dateElement.click();  // Click the date
        break;                // Exit the loop after selecting
    }
}
Notes:
- Make sure the date is visible and clickable in the current month view.
- You may need to handle navigation if the required date is in a different month/year (e.g., clicking “Next” or “Prev” buttons).
- XPath //table[@class=’ui-datepicker-calendar’]//td assumes a jQuery UI calendar; adjust it if your application uses a different structure.
Scrolling Using JavaScriptExecutor
JavaScriptExecutor is a powerful Selenium interface that allows you to execute JavaScript code directly from your test script. It is especially helpful for handling complex or dynamic web scenarios that are difficult to manage with native Selenium commands alone.
Scroll by Pixel Using window.scrollBy(x, y)
((JavascriptExecutor) driver).executeScript("window.scrollBy(x, y)");- x — number of pixels to scroll horizontally
- y — number of pixels to scroll vertically
Example: Scroll Down by 1000 Pixels
((JavascriptExecutor) driver).executeScript("window.scrollBy(0, 1000)");This scrolls the page down by 1000 pixels vertically.
Scroll to a Specific Element Using scrollIntoView()
Use scrollIntoView(true) to scroll the page until the target element is within the visible portion of the browser window.
((JavascriptExecutor) driver).executeScript("arguments[0].scrollIntoView(true);", element);Example
WebElement element = driver.findElement(By.id("myButton"));
((JavascriptExecutor) driver).executeScript("arguments[0].scrollIntoView(true);", element);
After this script runs, the element with id="myButton" will be scrolled into view so it can be clicked or interacted with.